On your iPhone, you may delete subscriptions by going to Settings, selecting your Apple ID card, Subscriptions, and then pressing the one you want to delete. Then click Cancel Subscription, then click Confirm.
Our explanation of how to cancel subscriptions on iPhone 13 continues below, complete with screenshots.
You may also watch this video to learn how to delete iPhone subscriptions.
Checking for and Cancelling iOS Subscriptions
The steps in this post were carried out on an iPhone 13 running iOS 17.
Step 1: Launch the iPhone Settings app.
Step 2: At the top of the menu, click on your name.
Step 3: In the top area, select Subscriptions.
Step 4: Choose the iPhone subscription you wish to cancel.
Step 5: Click the Cancel Subscription link.
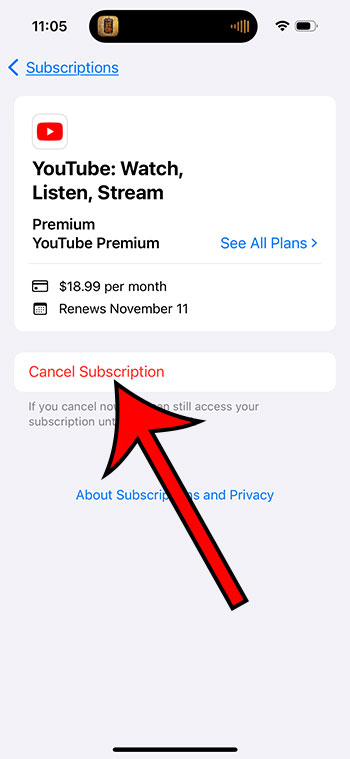
Step 6: Tap the Confirm button to confirm that you want to cancel this subscription when the current term expires.
Now that you know how to delete subscriptions on iPhone 13, you may return to our site on a regular basis to ensure that you haven’t forgotten about any subscriptions or that you don’t have any that you’re paying for but not using.
Deleting iPhone Subscriptions Video
Canceling or Deleting iPhone 13 Subscriptions: More Information
In the list of subscriptions on your device, you’ll see an “expired” or “inactive” column.
These are subscriptions that you used to have but are no longer active.
Unfortunately, you cannot remove these subscriptions from this option directly, and they must be deleted after a year.
You can also access your iPhone subscriptions by going to the App Store and tapping the profile icon in the upper-right corner of the screen.
Then, select Subscriptions to gain access to the information shown in the preceding section.
You can also start the iTunes application from your Windows laptop or desktop computer.
Select Account, then View My Account, and finally, View Account to open the correct menu.
Select the Manage icon to the right of Subscriptions in the Settings section.
A menu similar to the one described above is available here.
It’s critical to remember that most iPhone subscriptions will not be refunded. The subscription will simply terminate when the current subscription period finishes.
Related: How to Turn Off the Inverted Camera on an iPhone 13
How to Cancel an iPhone Subscription in Summary
- Navigate to Settings.
- Choose a name.
- Select Subscriptions.
- Select a subscription.
- Select Cancel Subscription.
- Click Confirm.
Conclusion
Many iPhone 13 apps and services will require a monthly or yearly subscription.
Because this payment scheme is so prevalent, it’s easy to lose track of your recurring subscriptions.
You can, thankfully, access this information on your smartphone in a few simple steps and cancel any existing subscriptions that you no longer require.
You may be utilizing a subscription service if you listen to music or watch movies on your iPhone.
You may also have subscriptions to fitness apps, games, or cloud storage services in addition to these options.
It can be difficult to keep track of everything when you have so many different reasons for paying for a subscription on your iPhone.
Fortunately, the Settings app has a tab that lists all of your active and inactive subscriptions.
If you find something you no longer want or need, you can cancel it from your iPhone right away by following the procedures outlined above.